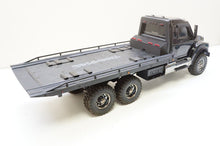
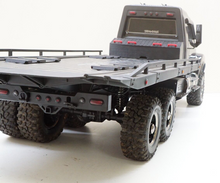
Bed Widening Expansion Kit +1" Wide Bed for Traxxas TRX6 Flatbed Hauler TRX-6
  • Load image into Gallery viewer, Bed Widening Expansion Kit +1" Wide Bed for Traxxas TRX6 Flatbed Hauler TRX-6
  • Load image into Gallery viewer, Bed Widening Expansion Kit +1" Wide Bed for Traxxas TRX6 Flatbed Hauler TRX-6
  • Load image into Gallery viewer, Bed Widening Expansion Kit +1" Wide Bed for Traxxas TRX6 Flatbed Hauler TRX-6
  • Load image into Gallery viewer, Bed Widening Expansion Kit +1" Wide Bed for Traxxas TRX6 Flatbed Hauler TRX-6
  • Load image into Gallery viewer, Bed Widening Expansion Kit +1" Wide Bed for Traxxas TRX6 Flatbed Hauler TRX-6
  • Load image into Gallery viewer, Bed Widening Expansion Kit +1" Wide Bed for Traxxas TRX6 Flatbed Hauler TRX-6
  • Load image into Gallery viewer, Bed Widening Expansion Kit +1" Wide Bed for Traxxas TRX6 Flatbed Hauler TRX-6
  • Load image into Gallery viewer, Bed Widening Expansion Kit +1" Wide Bed for Traxxas TRX6 Flatbed Hauler TRX-6
  • Load image into Gallery viewer, Bed Widening Expansion Kit +1" Wide Bed for Traxxas TRX6 Flatbed Hauler TRX-6
  • Load image into Gallery viewer, Bed Widening Expansion Kit +1" Wide Bed for Traxxas TRX6 Flatbed Hauler TRX-6
  • Load image into Gallery viewer, Bed Widening Expansion Kit +1" Wide Bed for Traxxas TRX6 Flatbed Hauler TRX-6
  • Load image into Gallery viewer, Bed Widening Expansion Kit +1" Wide Bed for Traxxas TRX6 Flatbed Hauler TRX-6

Bed Widening Expansion Kit +1" Wide Bed for Traxxas TRX6 Flatbed Hauler TRX-6

Regular price
$39.00
Sale price
$39.00
Regular price
Sold out
Unit price
per 
Shipping calculated at checkout.

AJCMods 3D Printed +1" Bed Widening Kit for the TRX6 Flatbed Hauler! Perfect for hauling NPRC Drag Cars!

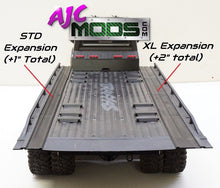
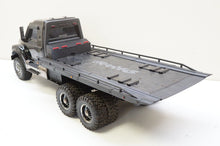
Great upgrade that adds a little over 0.5" on either side which allows you to haul a wider variety of 1/10 and 1/8 scale cars, trucks, and crawlers rather than just a few select cars that fit on the hauler in its stock form. This is an 8-piece set that bolts together and then slides right in place in between the stock bed and the stock railings. This is our slimmer version which does not require the use of dually wheels like our XL version. This slim 1" version is a nice look and fit with either standard wheels or a dually setup!


Instructions:

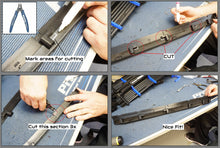
Assembly and install is fairly straightforward, but you will need to spend a good amount of time up front prepping the hauler for install. You must first cut all under-bed zip ties that secure the LED wire looms so the light wires can unwind and "stretch" the +1" on either side needed for the expansion. Some of these can be tricky to get to, we recommend using a Plato 170 or similar tool. Additionally, a zip tie that is towards the back of the main cub must be snipped, this can be accessed from underneath and is tucked up inside about 3" - it will be tricky to snip this last one! Now you can remove the side panel bolts to release each side rail, be sure to pop out each LED. First assemble the two sides together, being sure to follow the markings of each piece - D1, D2, D3, D4 for Drivers side, and P1, P2, P3, P4 for passenger side. These pieces bolt together using the (3) provided M3x25 screws for either side. Once you have two assemblies, remove and discard the side rail screws, and line up the wide kit with the stock side rails. You will need to cut (3) small pieces of plastic away from the underside of each side rail, instructions shown below. Removing these plastic bits will ensure the two pieces sit together just right. You can use the Plato 170 again for this, or score it with a razor and pull the pieces away. Install each side with the provided M3x40 screws, During this process ensure that no LED wires are being pulled too tight. Once installed check to confirm all LEDs are working, install the provided zip-ties where needed, and you are good to go!